Tuning Mouthpipe Mechanisms for Eb Cornets
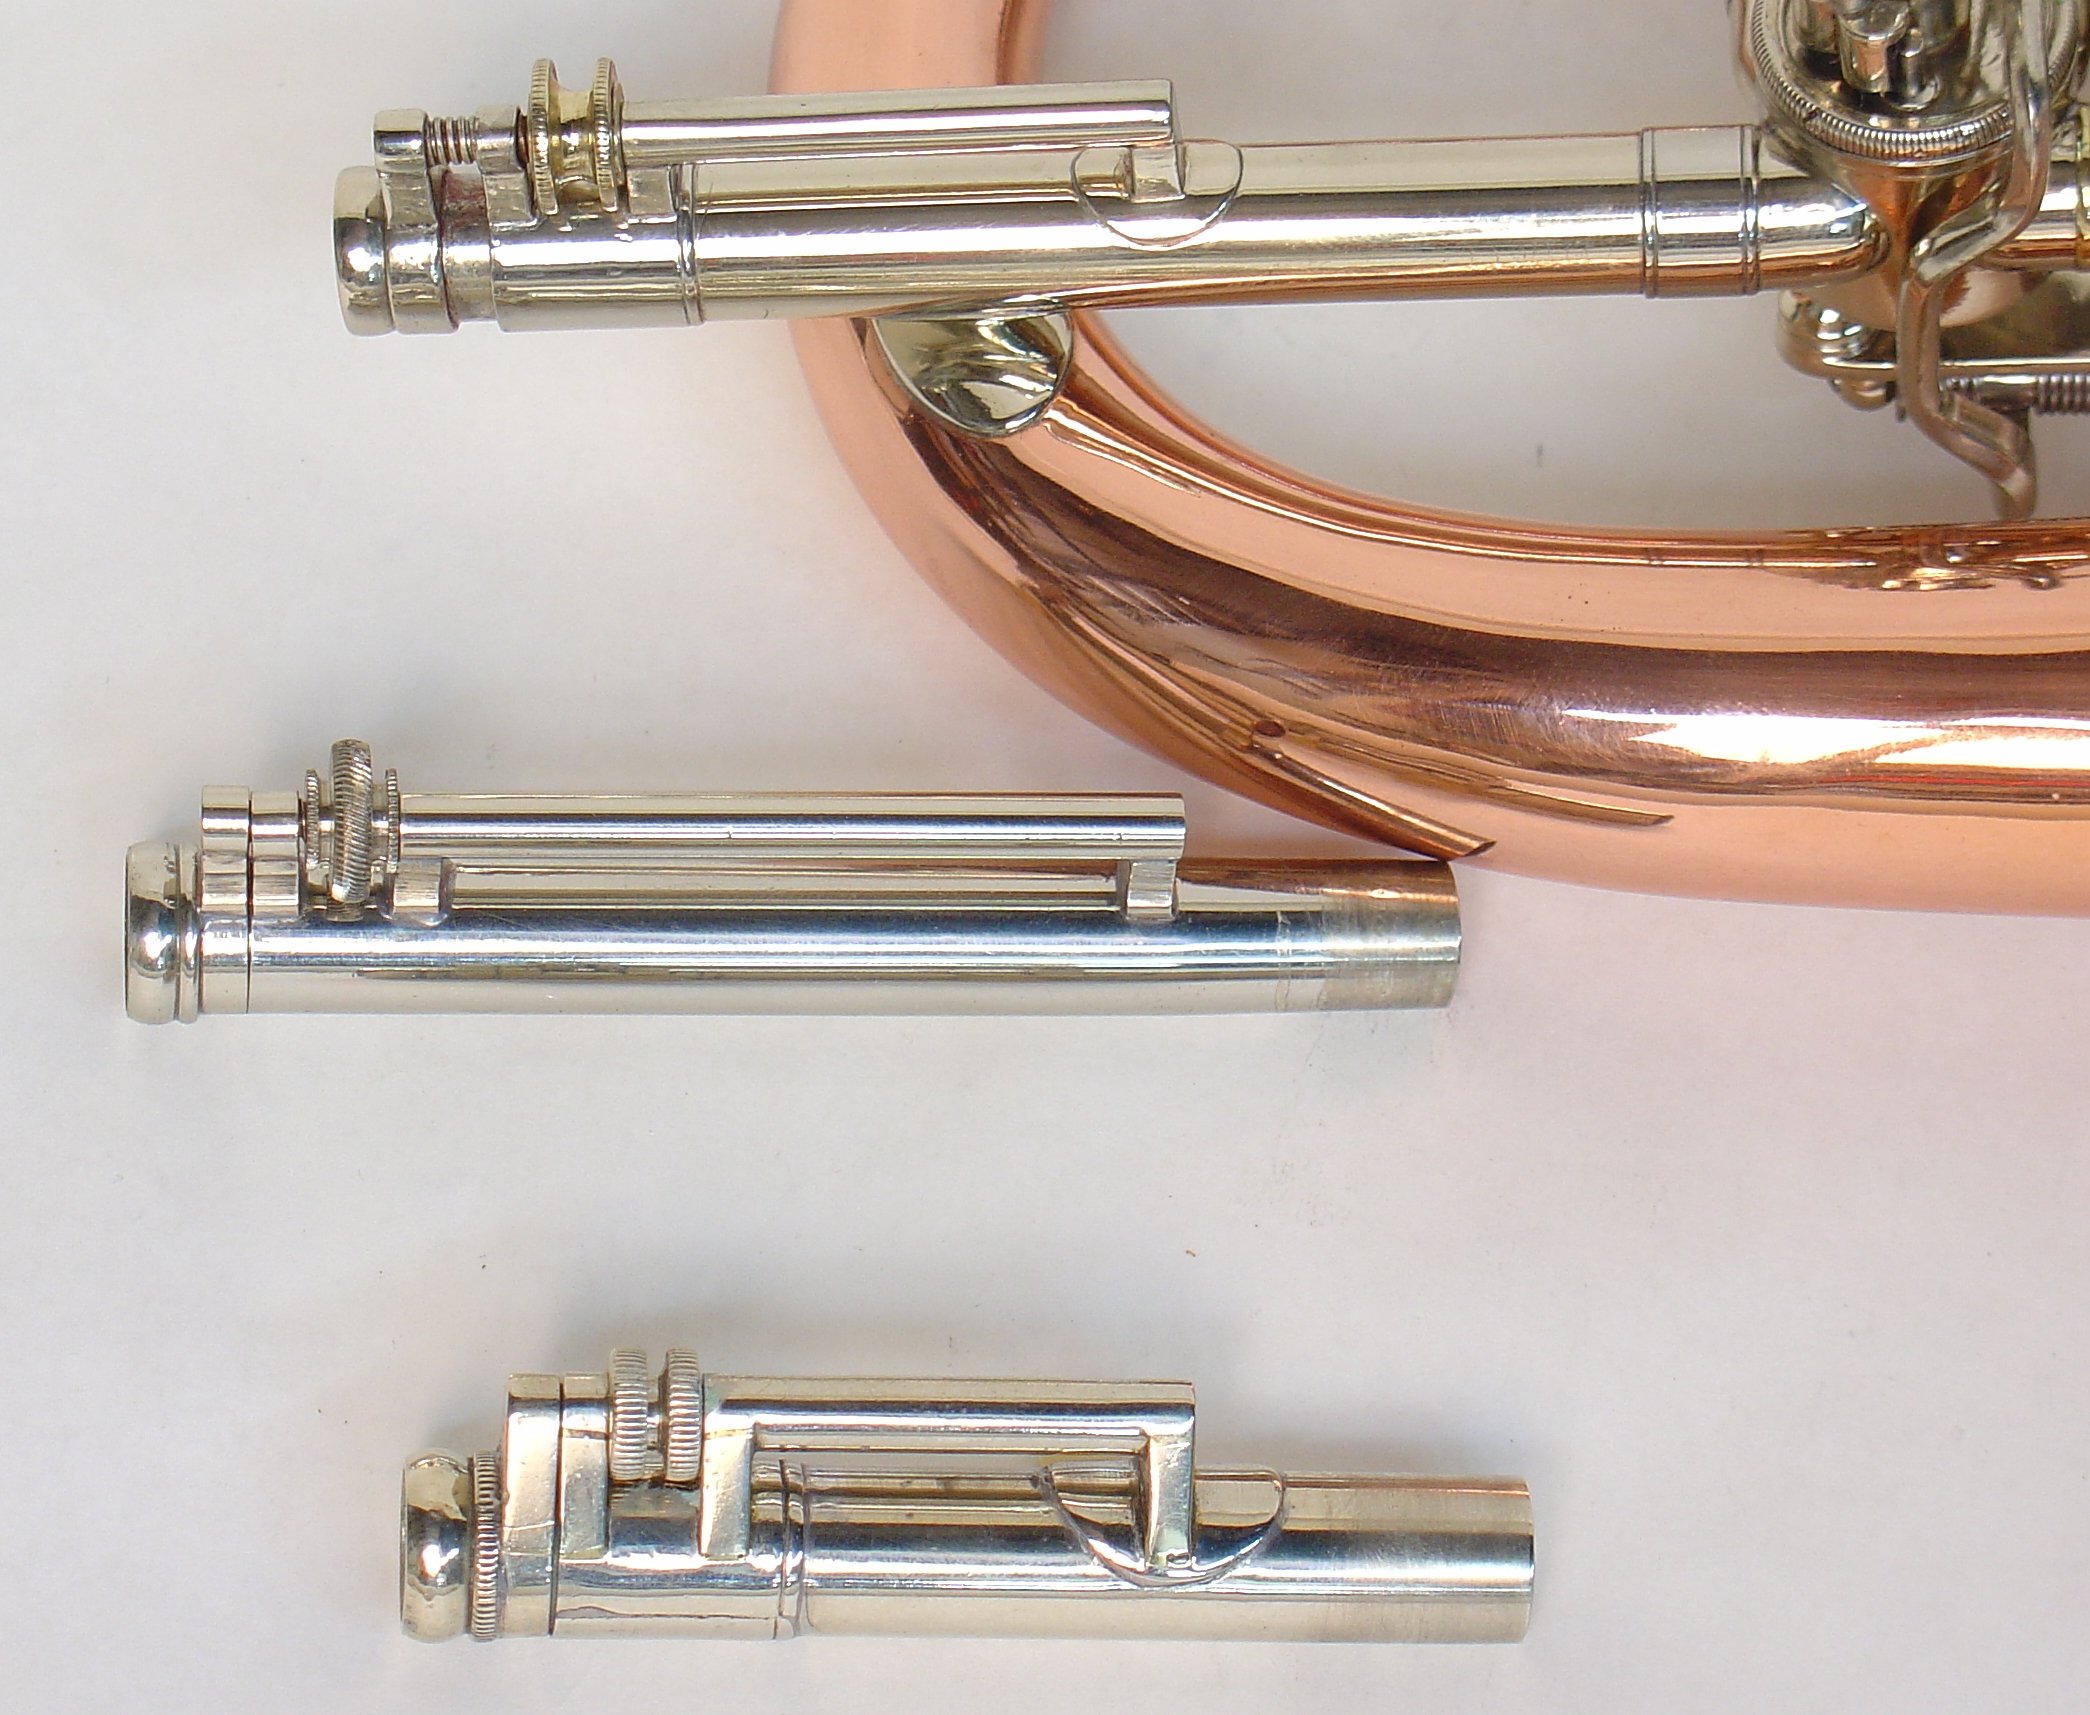
One of the more difficult assemblies to replicate accurately is the tuning mouthpipes that were used on most American style Eb keyed bugles and cornets between about 1850 and 1875. The most numerous of these were on Eb cornets made in eastern Europe for the US market up until the mid-1880s but the design likely originated in Boston in the late 1830s by Henry Sibley for his soprano keyed bugles. The first photo shows an E.G. Wright Eb soprano on the top, a reproduction tuning shank for a Wright Eb keyed bugle in the middle and an original from a Lehnert pocket Eb cornet on the bottom.
Tuning assemblies on 1860s E.G. Wright soprano, replica for Wright Eb keyed bugle and original from 1870s Lehner soprano.
These mechanism consists of four posts, three on the fixed, outer slide tube and one on the sliding mouthpipe on which is mounted a threaded rod. A mating nut is captured between two posts and when rotated, pushes or pulls the mouthpipe and holds it in place once the instrument is tuned. This works very well, but is somewhat delicate and often damaged or completely missing.
I've seen many replacements that may function well, but don't look like the originals. Designs vary among makers and even within one shop in different years and I can't blame the average repairman that hasn't seen many antiques for not getting it closer. Also, most customers are not willing to pay for the meticulous work involved in making it right. It is a fussy assembly to reproduce, consisting of more than a dozen very small parts including the slide tubes.
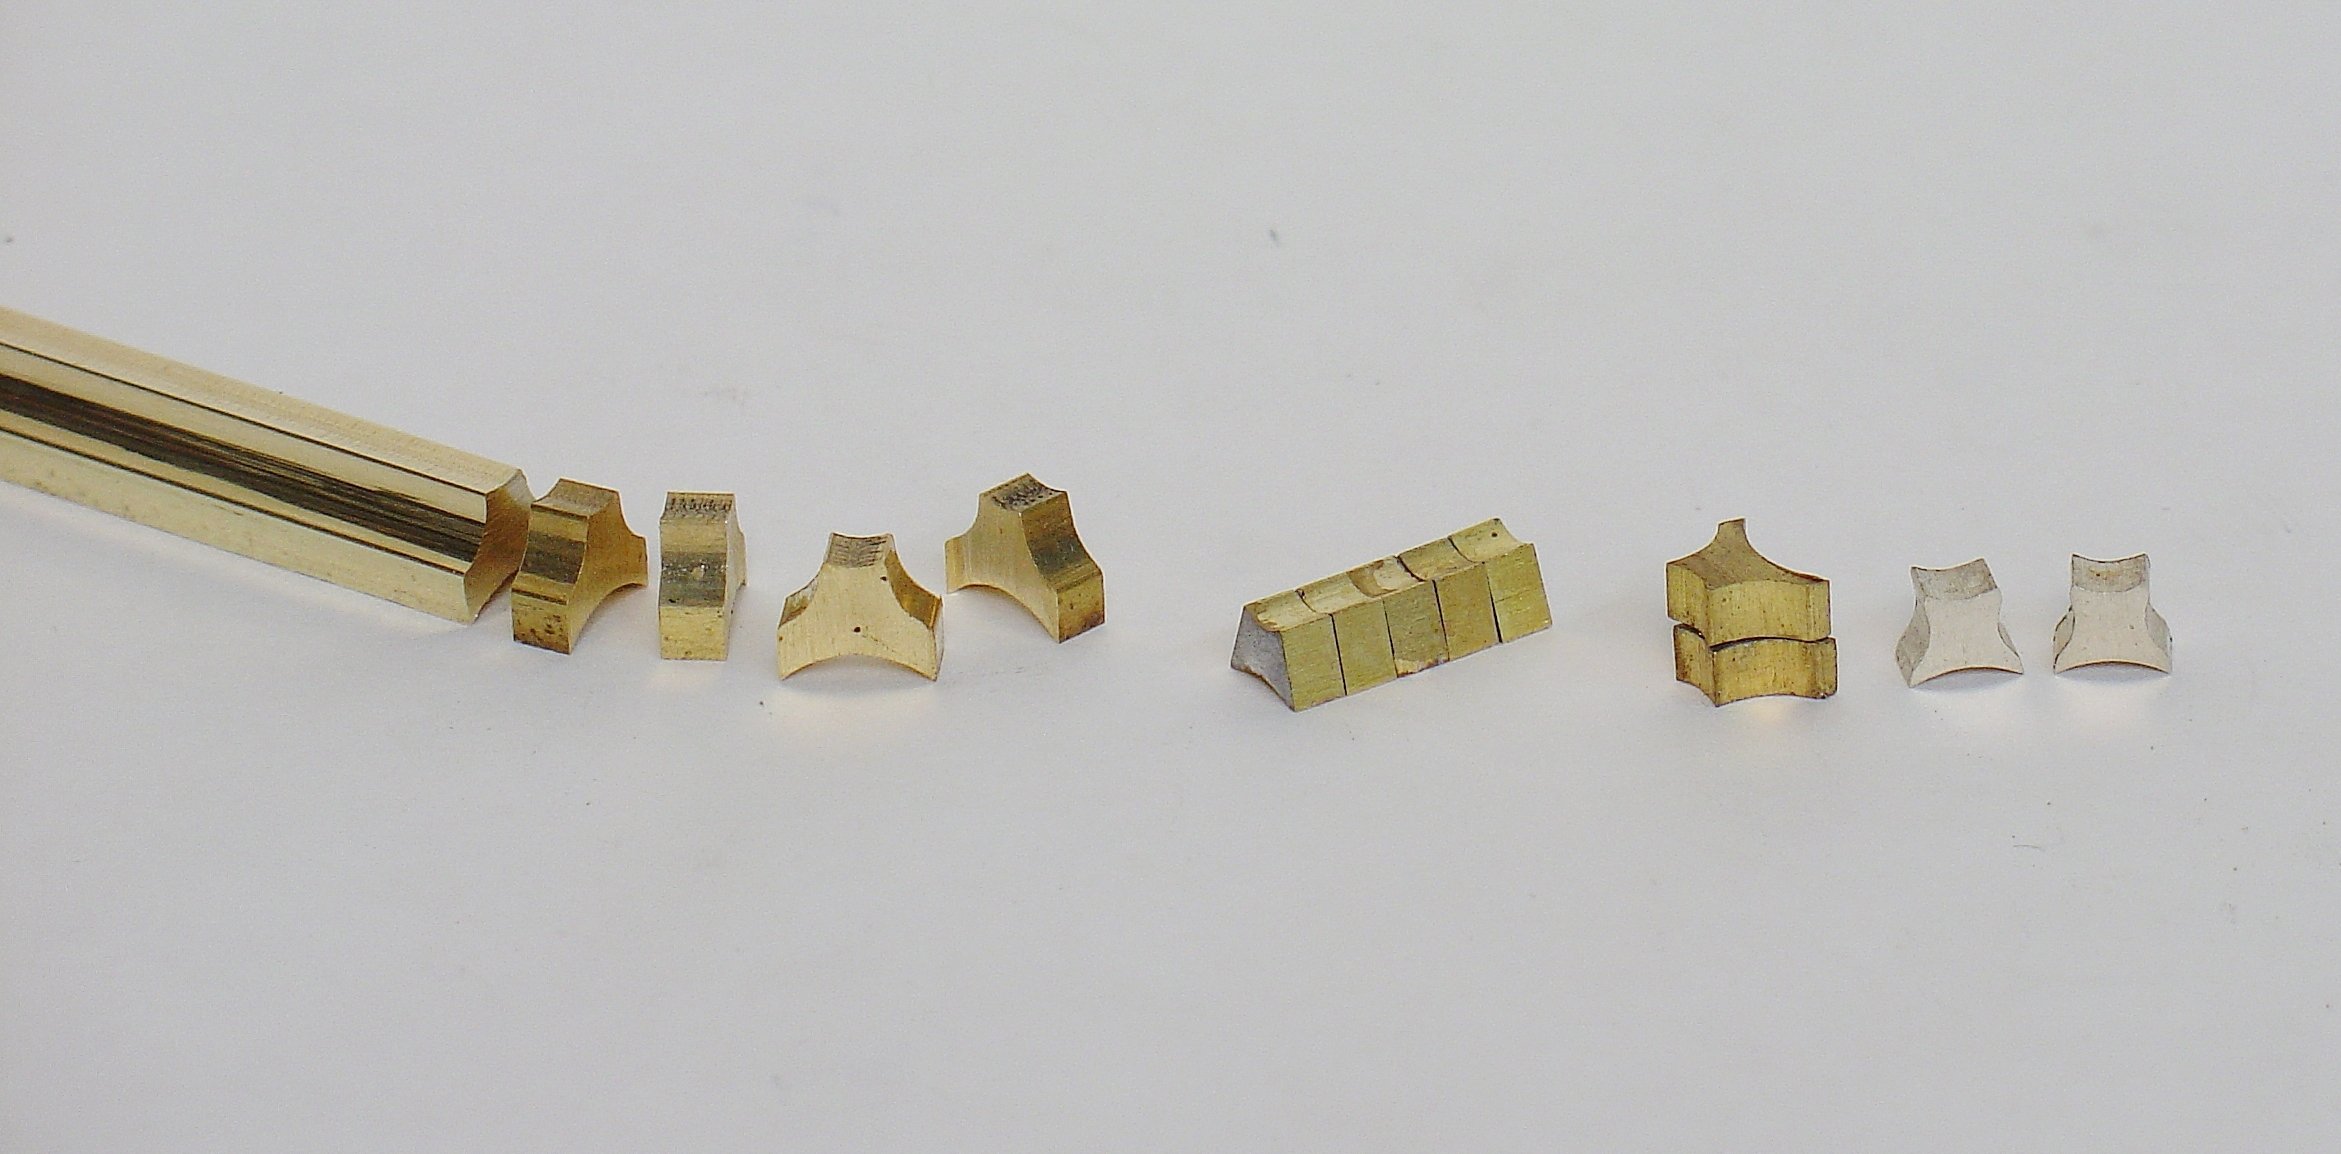
The second photo shows two different ways to make the posts. On the left is a brass rod that has been machined to the profile of the posts from which they can be sliced off with a saw. If set up in a small cut off saw or table saw, they can all be the exact width. Another technique that I have used more often is to cut rectangles from flat stock that is already the correct width of the posts and slightly oversize in other dimensions. I carefully stack these together with a sacrificial piece on each end (a stack of six or ten for one or two assemblies respectively) and soft solder them together. Then I file the profile on the sides of the resultant rod then un-solder the shaped posts. Be sure to clean all of the soft solder from these posts before silver soldering the assembly. I use a fine hand file.
Two different methods for making posts for tuning assembly.
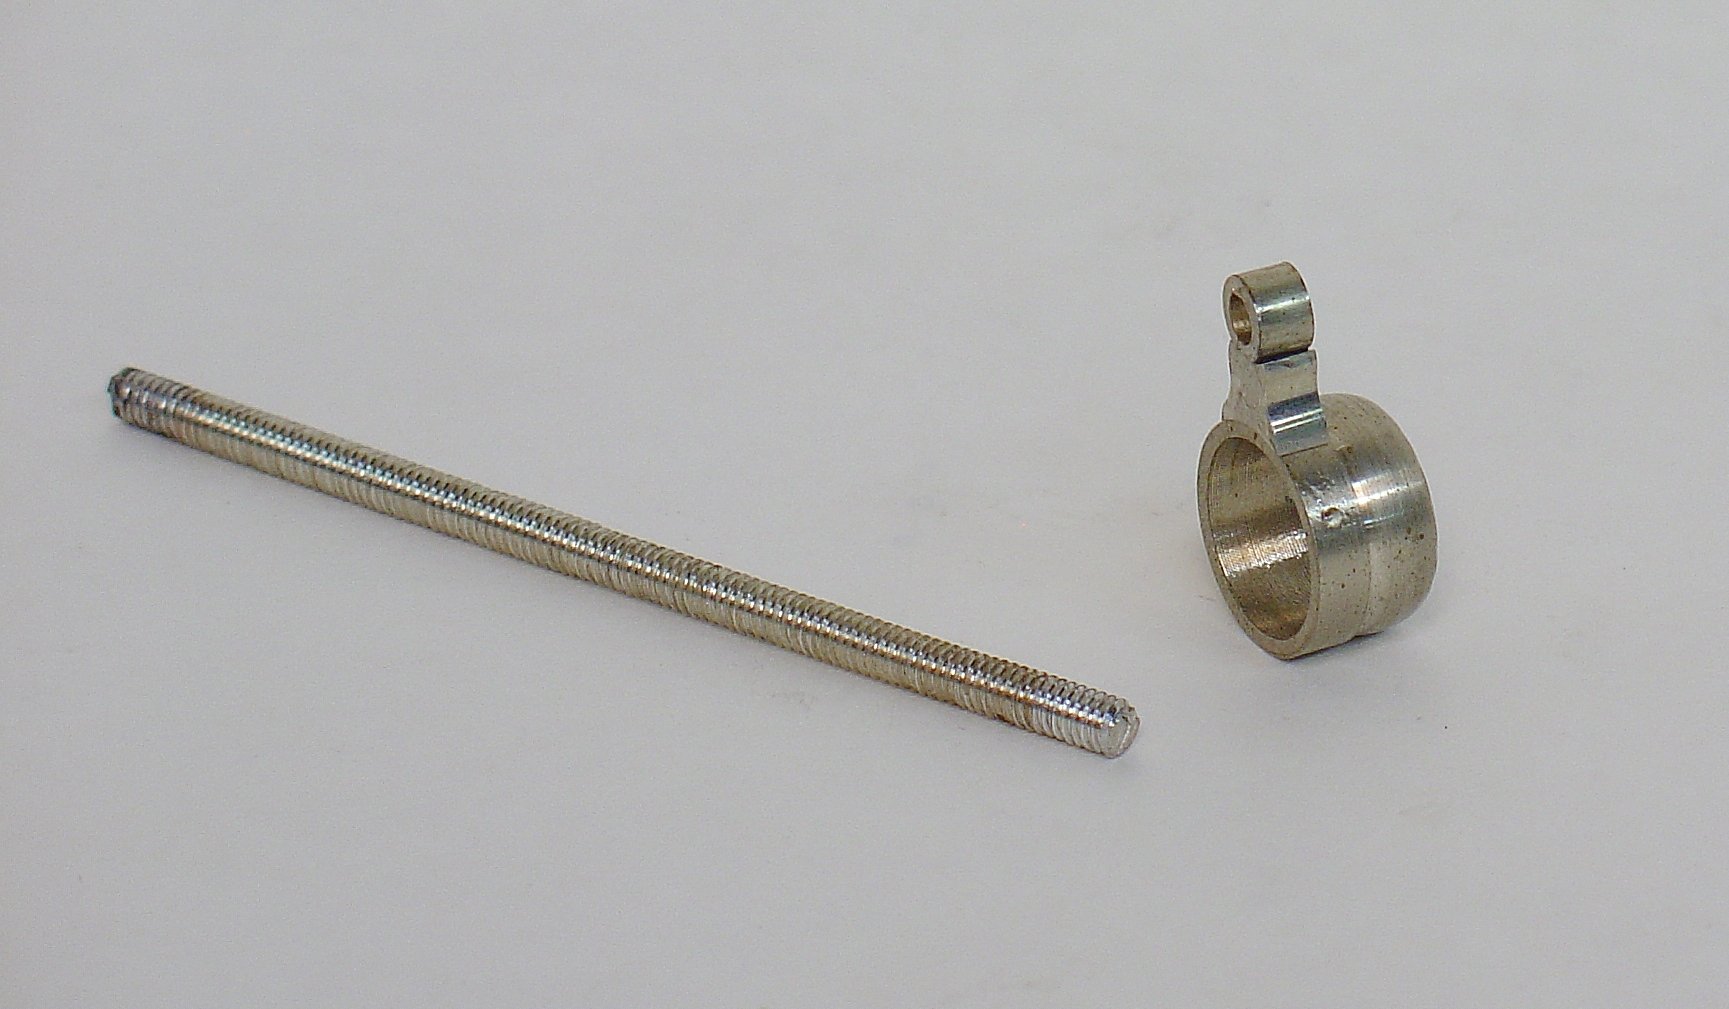
The two small rings closest to the mouthpiece receiver and the tube hiding the rod are the same outside diameter, but the foremost has a smaller inside diameter that is tapped to mate with the rod which is soldered in place. That very small tube can be made from brass tubing that is available from McMaster-Carr or hobby stores. When it has to be nickel silver, I make it by drilling rod stock.
Before soft soldering the threaded rod in place or the other parts to the slide tubes, the rest must be silver soldered. I find it best to set up a rudimentary jig consisting of a tube the same diameter of the outside slide to align the base and a rod to align the ring and small tube on the posts as I silver solder that assembly. The third photo shows the pieces (minus the tube) that will make up the sliding portion before silver soldering.
Assembly for sliding mouthpipe before silver soldering and threaded rod.
The fourth photo shows three typical designs for the tuning nut.
Three possible tuning nut designs.
Finding tubing of the exact dimensions for these sliding mouthpipes is usually impossible, but again, the commonly available tubing of the closest size can be used. To make exact sizes, I more often draw my own tubing as I described in a previous page.
There is a story behind the last photo: I restored an 1867 presentation Hall & Quinby Eb soprano for Jeff Stockham that was missing the entire tuning shank. I copied an original from an 1863 D.C. Hall instrument that was almost identical. I was very proud of how accurately I had made this assembly, but Jeff called me and said that he wanted me to make another one that was more accurate. I explained that it was a very good copy of the 1863 original and more accurate than most expect such things to be, but he told me that he had just seen a new acquisition of Mark Elrod's that was made about the same time as his and the tuning shank was slightly different. He was willing to pay full price for a second mouthpipe if I borrowed Mark's and made it exactly like that. Then it became a challenge to be even more meticulous than I usually am so that I can show in this photo the result. I kept my caliper at hand at all times to measure and remeasure as I progressed and other than the signs of age, the replica (bottom in photo) is very close to the original (top). The deviation in dimensions is under .002", although, I couldn't copy the original thread pitch, but rather used modern standard 5-40 thread for the nut and rod.
Original tuning shank from a Hall & Quinby Eb soprano, circa 1867 and replica below.


